Hi Taoworm thanks for the reply,
Yeah it was Christian I got most of my stuff from and he great, we exchanged a few mails back and forth alright but I still couldnt get it to work

It was just a thought that maybe some of the replica builders here might have been able to say connect A to whatever etc.
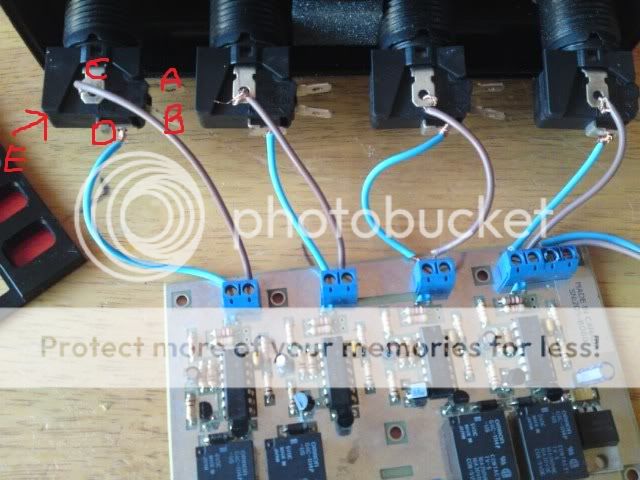
Below is the first set of instructions I got but to be honest cant work out what goes where

Latching interface (K205)
Note: following instructions are in reference to the PANP buttons but the latching interface can as well be used with any momentary push button.
The PANP push buttons are momentary. If you want a switch to hold the contact after touching it, you need the interface board. The interface board is simply an array of 4 separate, identical latching circuits. You use one, two, three or all four depending on what you want to do with the push buttons.
Connect +12V and GND to the interface board to supply power to it.
The PP, AA, NN and PP indications are only a reference, you do not have to follow any specific order. My suggestion is to associate PP to Power, AA to Auto, NN to Normal and the second PP to Pursuit. To use the interface, the momentary push buttons connect to the PP or AA or NN or PP again. The momentary contact will be applied to that side. If this is not clear enough, connect the terminal identified C (for Common) to the first P and connect the NO (Normally Open) terminal of the same switch to the second P.
On the other side of the interface board you have P A N P terminals. These are the 4 outputs which will be turned on and off when a momentary push button switch is connected to the other side.